How To Host Your Own DIY Charcuterie Box Party
This post contains affiliate links. I may earn a small commission on any purchase made from products purchased after clicking the links
Ever since the start of the pandemic, I have been excited about having friends over for a Golden Girls-inspired girls’ day out. Combined with my love of the charcuterie board trend that still going strong, making it a DIY charcuterie box party was a must. Read on for a few ideas to inspire your next gathering.
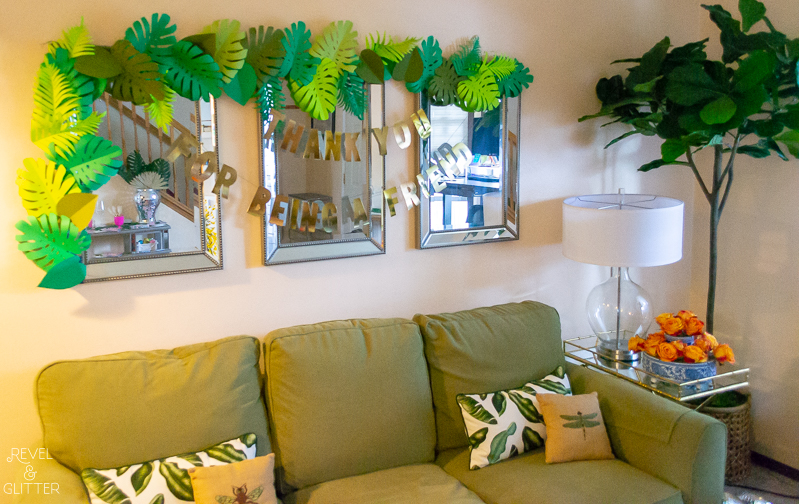

Let’s set the scene…I kept it simple with most of the decor set up in my front living room where the food would be staged. What would 80’s Miami vibes be without a few tropical touches? To create a garland, I was going to use this template to trace leave out of cardstock. But, I realized I don’t have the time. Sure, I have the craft skills to do many things myself, but I am learning that a. I don’t have to and b. I shouldn’t feel guilty if I outsource.
With this great set of various tropical leaves from Etsy shop Creativepartyworld, I adhered them to ribbon to create a garland, then finished the look with a gold cardstock letter banner. A few pillows (mine were an off-season score, find a similar one here), my existing fig leaf tree, and disco balls made everything come together.

Using a large, colorful silk scarf for a table cover and my collection of vintage pieces to capture the long-before-it-was-cool grandmillenial vibe that was The Golden Girls. Of course, there was cheesecake with various fruit and syrup toppings.
Yes, we have to shout out our favorite Golden Girls, Rose Nyland, with lots of roses…and a bucket full of rosé!

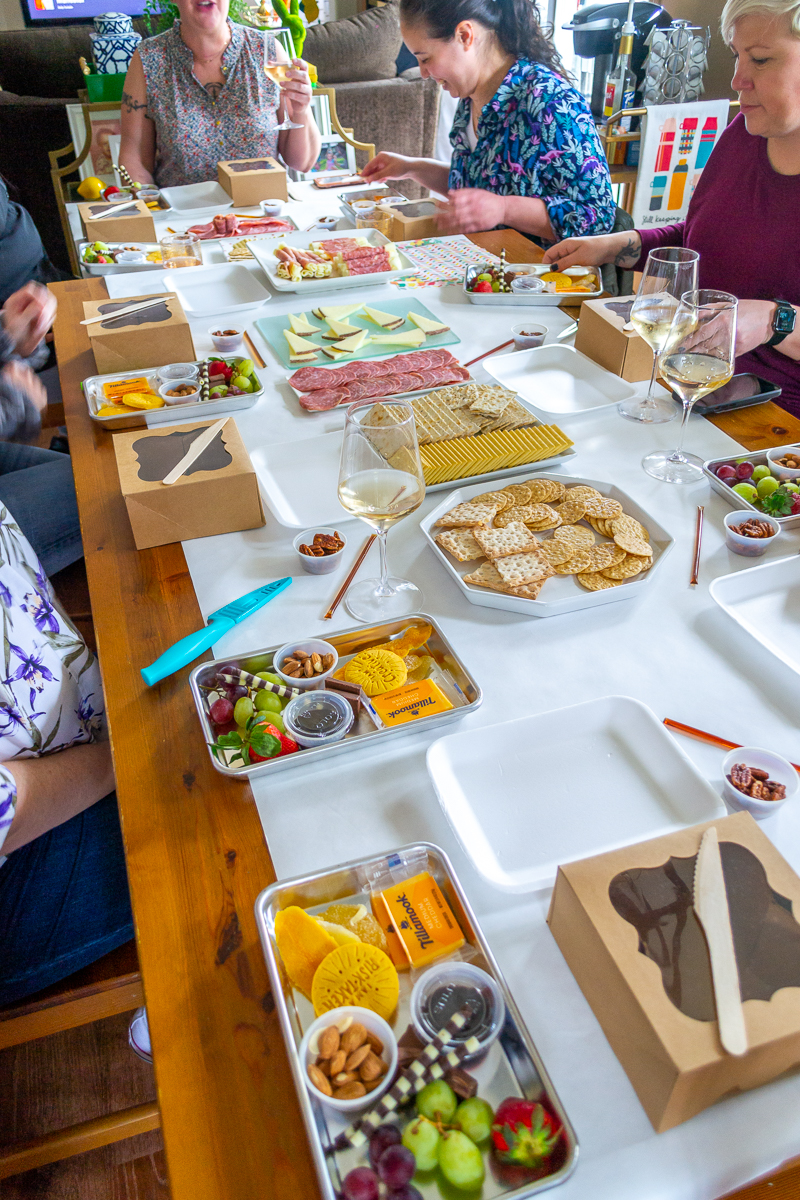
Then, after a few glasses and a few laughs, we moved to the charcuterie box-making part. The key to this party is having everything pre-portioned and simplified for everyone to feel comfortable enough to get creative.
What goes into your charcuterie box is limited only to what you have available and your budget. My go-to is always Trader Joe’s, they have a great selection of everything you really need, from cheese and crackers to candy, dried fruit, and nuts.
The key to any type of food board is variety. If you are doing any numerous types of food boards that exist, you’ll need variety, from flavor and color to texture, size, and shape. I followed a blueprint of including sweet, savory, crunchy, and salty items that are universally enjoyed.

To minimize decision-making and keep everything within reach, I built out a small metal tray of items. These were easy to create and pop into the fridge before the party. Plus, the metal tray helps to keep your perishable items cold.
- dip cups of seasonal jam and raw almonds
- fresh fruit
- dried mango and ginger
- Lemon-Ups Girl Scouts cookie – the baked-in messages are so on brand
- packaged cheddar cheese slices
- chocolate sticks and pieces
At each place setting:
- A foam tray from the dollar store to use as a work surface
- honey stick
- dip cup of candied almonds
- wooden knife
- Each guest brought a small pairing knife
- 6″ window box
- 8″ square patterned parchment or wax paper to line the box; I trimmed mine from 12″ square sheets
I set out a variety of crackers and cheese, as well as prosciutto-wrapped cheese sticks, and Italian dry salami. A general charcuterie board rule of thumb is to get one soft cheese, one firm, and one hard cheese. But since this was a DIY, I didn’t go with soft cheese and stuck with firm and hard cheeses; a cheddar/gruyere, manchego, and the aforementioned cheddar cheese. Don’t think too hard about selecting cheeses and ask someone who works at the store to help you. They usually have wonderful suggestions.
My biggest tip to everyone is just have fun, no pressure, there is no right or wrong way. I did give them a few simple tips to jazz up some of their food items; how to:
- build a basic layout:
- keep cheese and crackers separate so they don’t get soggy
- start from one side/corner and build out to the opposite side
- start with large items as a base, then fill in with smaller ones, and use the smallest items to finish
- roll slices of Italian dried salami into roses
- cut and stack cheeses (inspired by this video)
- slice a strawberry in half to garnish
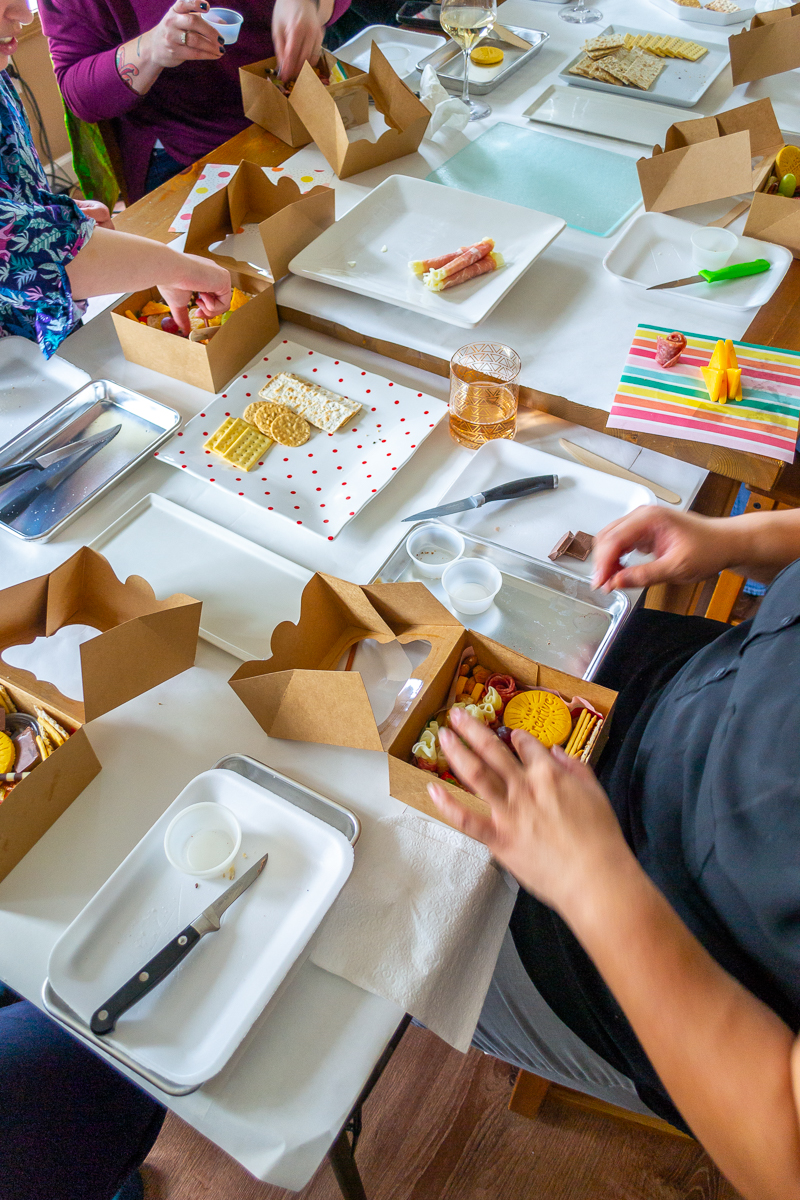
Although some were hesitant, once they got going, everyone was feeling the creativity flow. I loved watching people get excited and start experimenting with their items. Although they had the same items, everyone’s box was unique and fabulous.
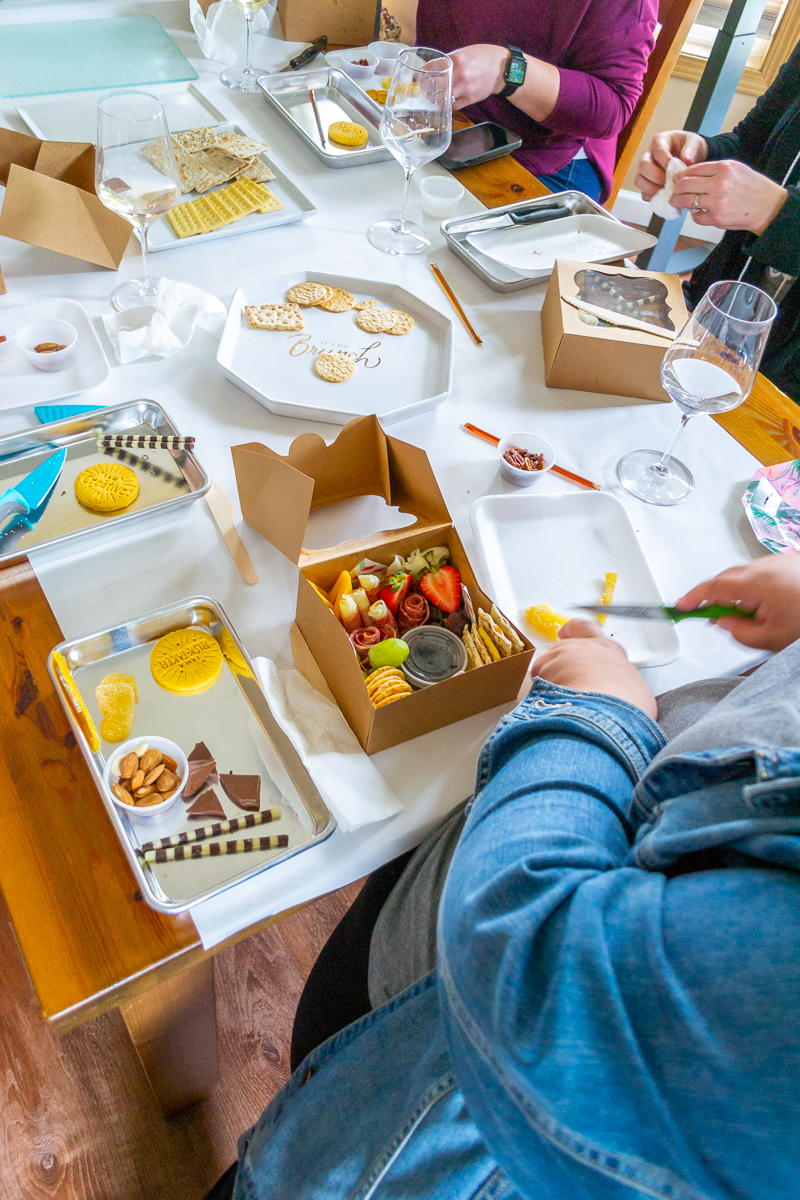
Then, we finished each box with the wooden knife on top. Originally, we would tie the box closed with twine and a spring of rosemary. I just couldn’t find a decent amount of rosemary that wasn’t an outrageous price. But, as always, they were just fine on their own.
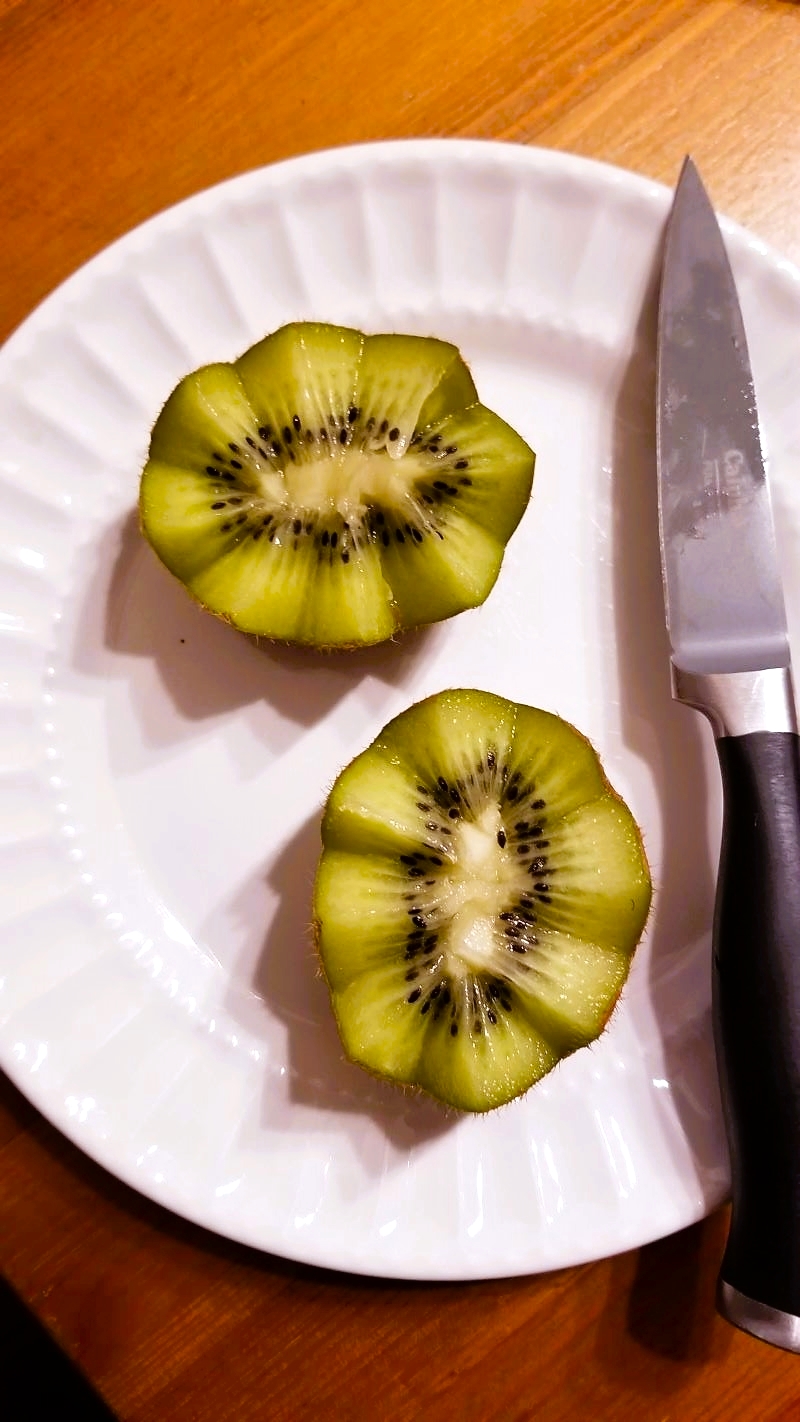
Another idea that I didn’t get to use, was making kiwi flowers. Once I saw how full the boxes were, the kiwi flowers would be too much. I will definitely file away my new skill for another time…and another board.

As a result, everyone went home with a custom creation that will be the envy of the household!
I hope you have been inspired to have a charcuterie box-making party for your girl gang. It’s a great way to spend the afternoon. Shop my look below for a few of my items: